Synology NASes have git server built-in, which is, IDK if anyone could have a use case on it, completely garbage except it provides you a git environment. Gitea is so much more useful. Let's do it.
Pre-requirement
Install
- MariaDB
- Git server
on your NAS via package center.
Build gitea package for DS119j
There is no Gitea package out-of-box for DS119j available, we need to build one on our own.
- Run
git clone https://github.com/flipswitchingmonkey/gitea-spk - to get a template and go to
https://github.com/go-gitea/gitea/releasesto download a binary for your platform.
For DS119j which is running on a armv8 CPU, we need thegitea-1.13.4-linux-arm-6 - Extract the binary (if needed) and put it along side your
gitea-spkarchive folder. - Open the
arch.descfile and appendarmada37xxto line of arm-6 to make package installer recognize our package. - Run
./create_spk.shto create our package. It should have a name ofgitea-1.13.4-linux-arm-6.spk
Install package
- Open package center setting on DS119j and lower the trust level to anyone.
- Do a manual install on the package we built just now. There should be no complain of the installer.
- Open the installed package.
Install Gitea
- On opening of the gitea app, it should take you to a welcome page located at
http://NASIP:3000and click install on the welcome page. Configure the gitea to whatever you like, but here are some caveats.
- Use mysql for mariadb or just use sqlite.
- Enable local mode should save you a lot of trouble.
- Install repo and logs to a system shared folder can be convenient for future debugging and management. Steps are explains in step 3.
If you would like to make repos more visualized and easier to manage with FileStation, you may consider configure gitea to use our synology shared folder as its destination.
- Create a shared folder in FileStation, easy!
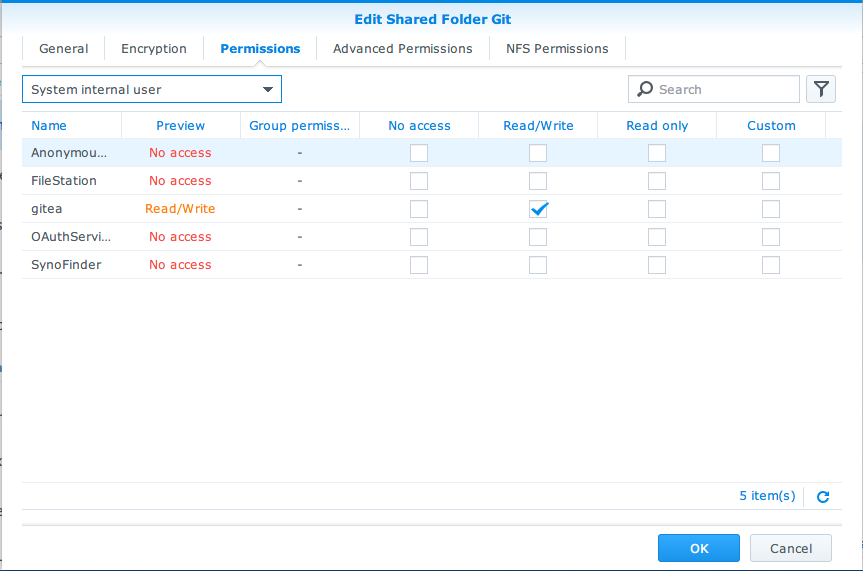
- Grant permission to the system internal account
gitea
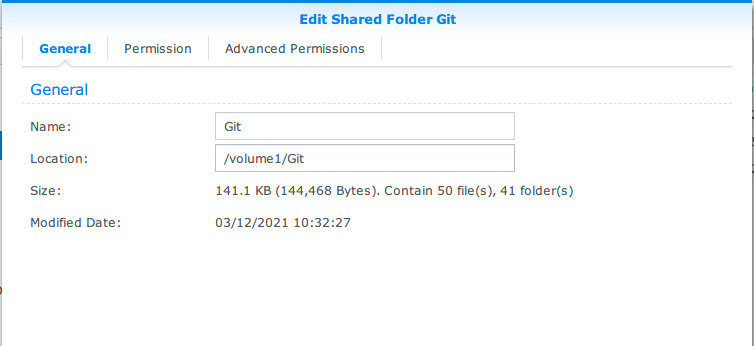
- Get folder location by viewing property in the FileStation.

- Set it as your gitea repo save location.
- SSH into your NAS and create a database for your gitea. It uses
giteaby default but it can't create one if it doesn't exist. - Press install and ..... it should fail.
You're right, it will fail 100% and complain about likeMySql/MariaDB issue: Error 1709: Index column size too large. The maximum column size is 767 bytes.That's because we are using MariaDB instead of what it is designed to run on.
Let's head over to Issue 2979. Ah, something need to be changed on our mariadb installation.
Run mysql -uroot -p YOURMYSQLPASSWORD to enter commandline mode, and run
SET GLOBAL innodb_large_prefix = ON;
SET GLOBAL innodb_file_format=Barracuda;
SET GLOBAL innodb_file_per_table=ON;
The gitea installation failed to completely create tables, but the tables are actually partially created.
run ALTER TABLE tablename ROW_FORMAT=DYNAMIC; to the existing tables and go back to the install page to continue. This may take some turns but will eventually let you finish the install process.
And we are done!
Enjoy.


0 comment